Image
ShelfLife is a new online box management system managed by the Government Records Services (GRS) division at the Library of Virginia. This system has replaced Infolinx as of July 2025.
For detailed instructions on using the system, please select the question mark icon once you've logged in. There is a tab for SRC Customers which explains how to complete various tasks.
Please Note:
You can use ShelfLife to:
You will log in to ShelfLife using credentials provided by your assigned records analyst. If you previously used Infolinx, your credentials should be the same.
Once you enter your login credentials, you will receive a multi-factor authentication prompt. The code will be sent to the email associated with your account. Use the code provided to fully log in.

Once you are logged in, you will be able to toggle light mode or dark mode.

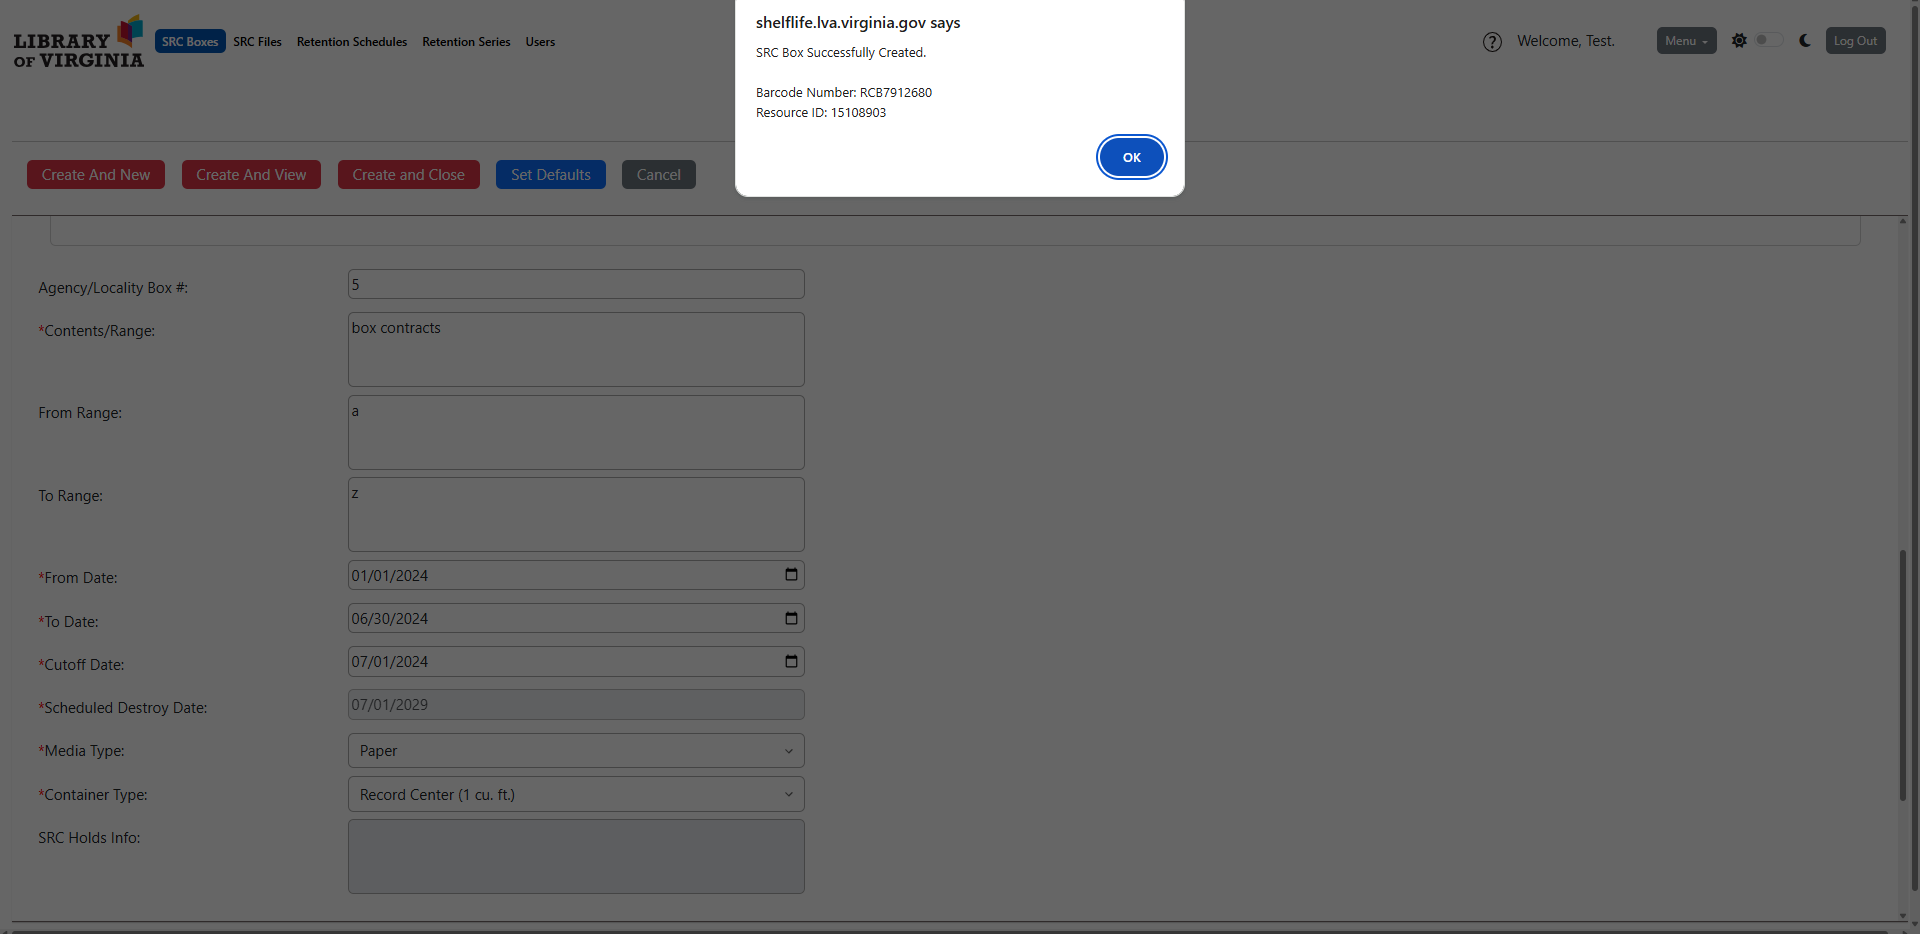
After logging in, you will be on the “SRC Boxes” tab. To create a new box from scratch, select the “Create” button.
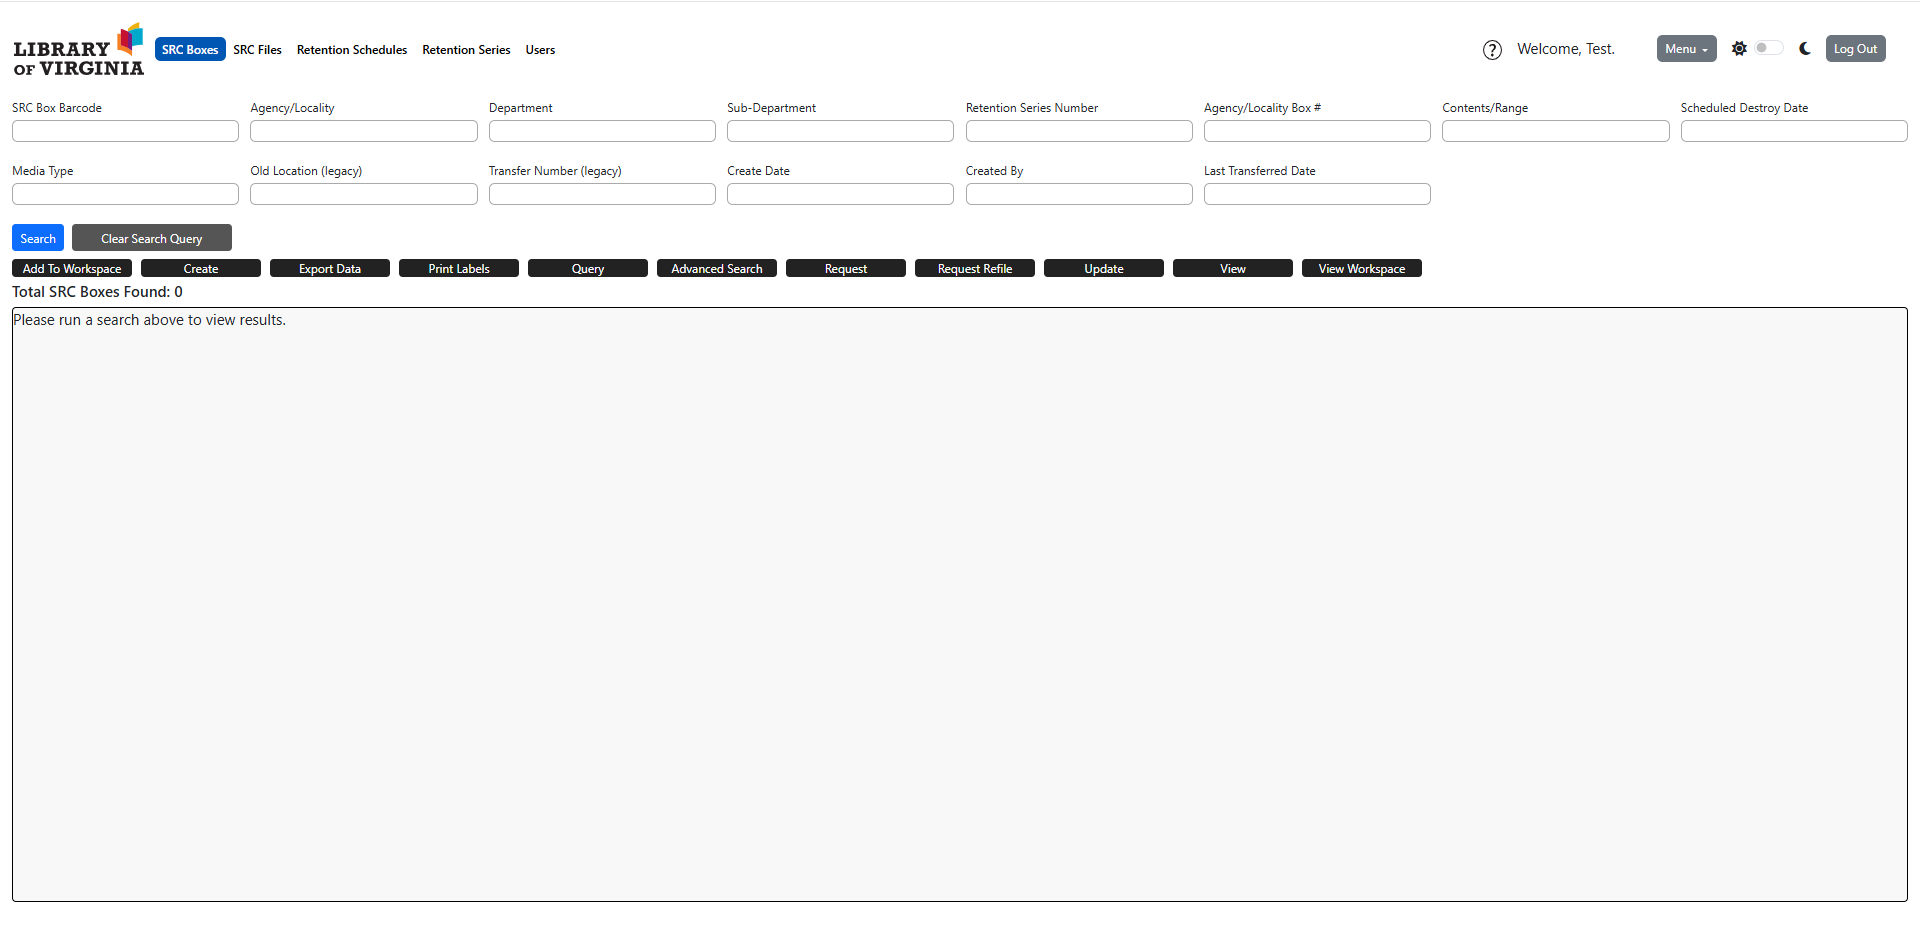
Your agency/locality field will be pre-filled. If you must add additional department or sub-department information, you will be able to do so via dropdowns.
To assign a retention series to your box, use the retention series search fields to find and select the appropriate series. Once you have finished entering information into the fields, select the blue search button within that section.
If you have entered a series number, the series should appear in your results. If this is the correct series, select the radio button at the beginning of the series. This will attach the series information to your box, which will appear in the “Retention Series Info” field above the search.

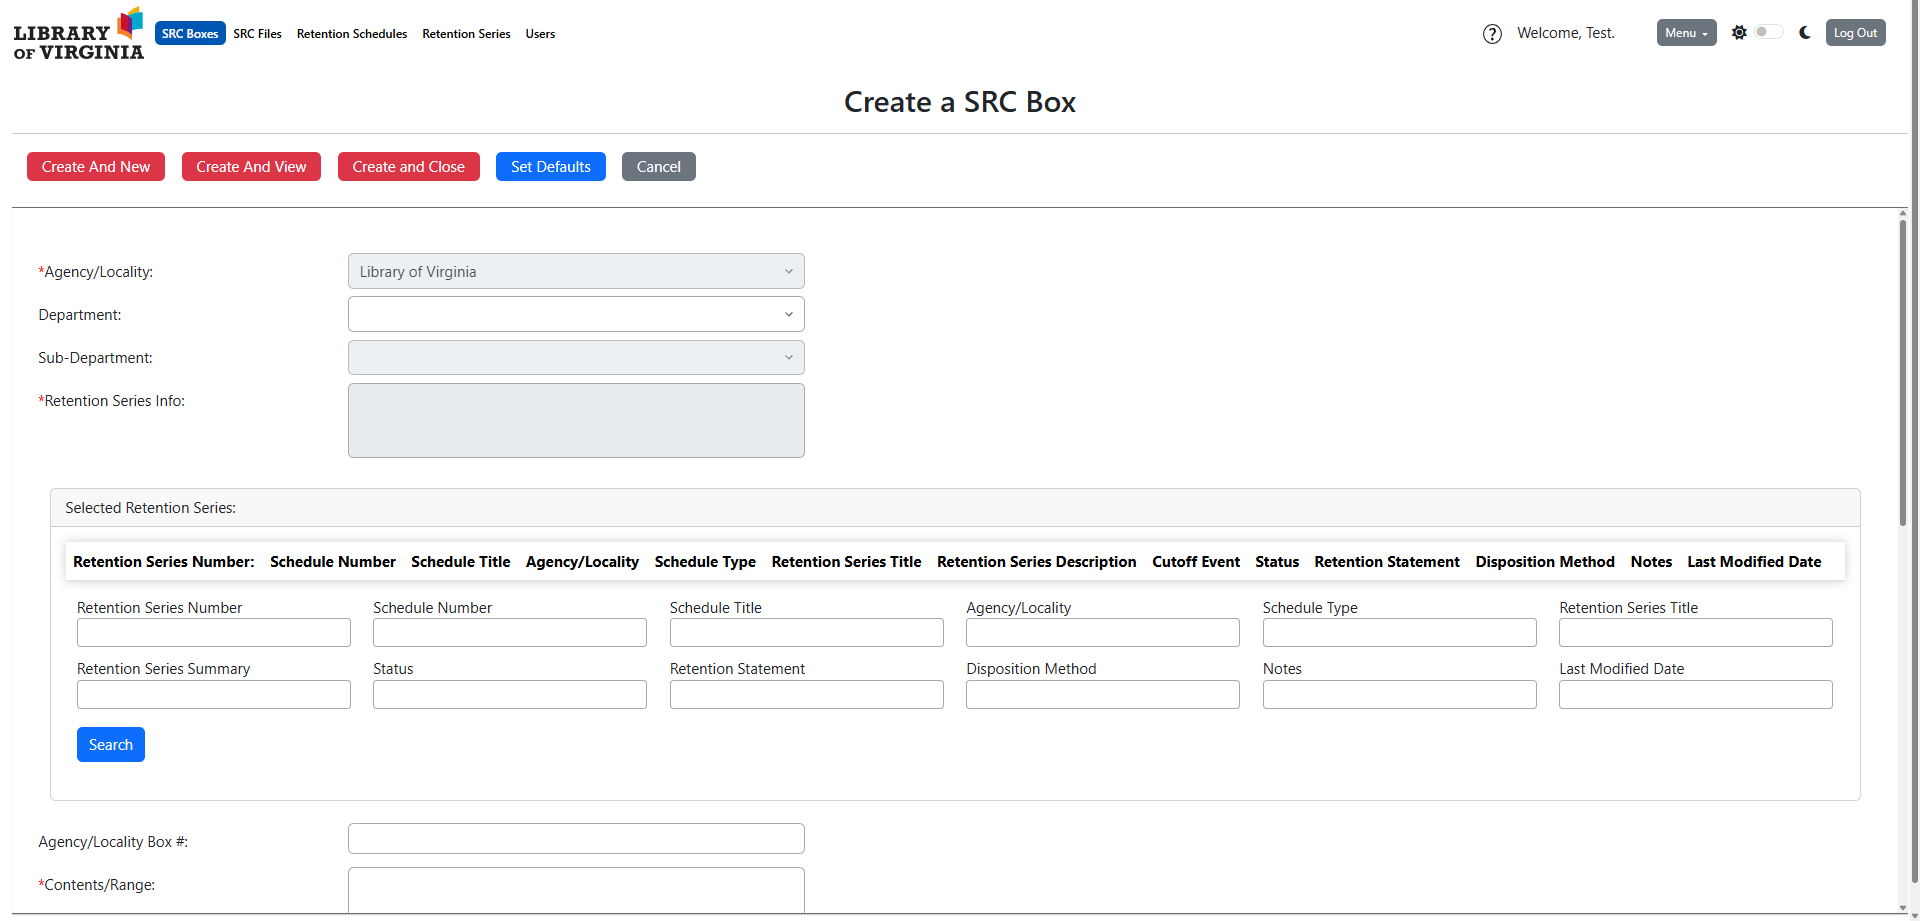
Continue scrolling down the page to complete the remaining required fields. Required fields include:
“Scheduled Destroy Date” is automatically generated. Ensure it is correct.
In most cases, Container Type is “Record Center (1 cu. Ft.).
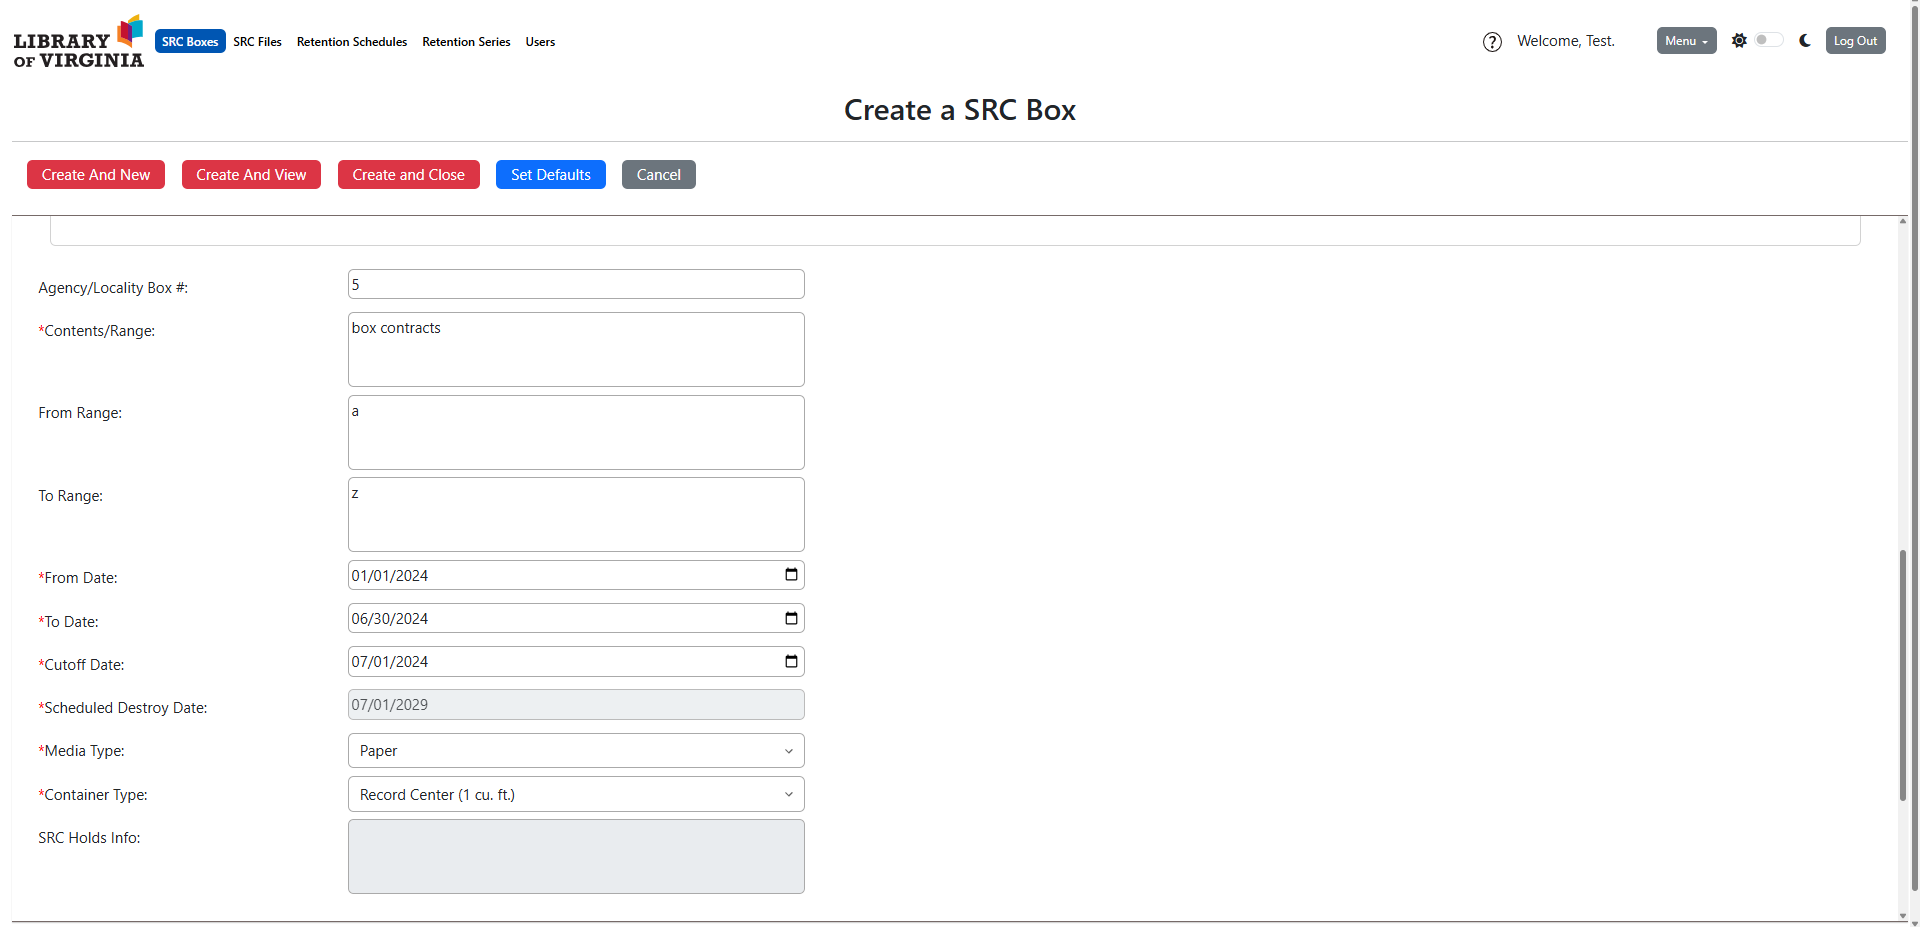
Once you have finished entering the required information, you can select one of three options:
If you would like to close the record without saving, you can select the gray “Cancel” button.
Once you’ve created the box, you will receive a pop-up message letting you know if the creation was a success.
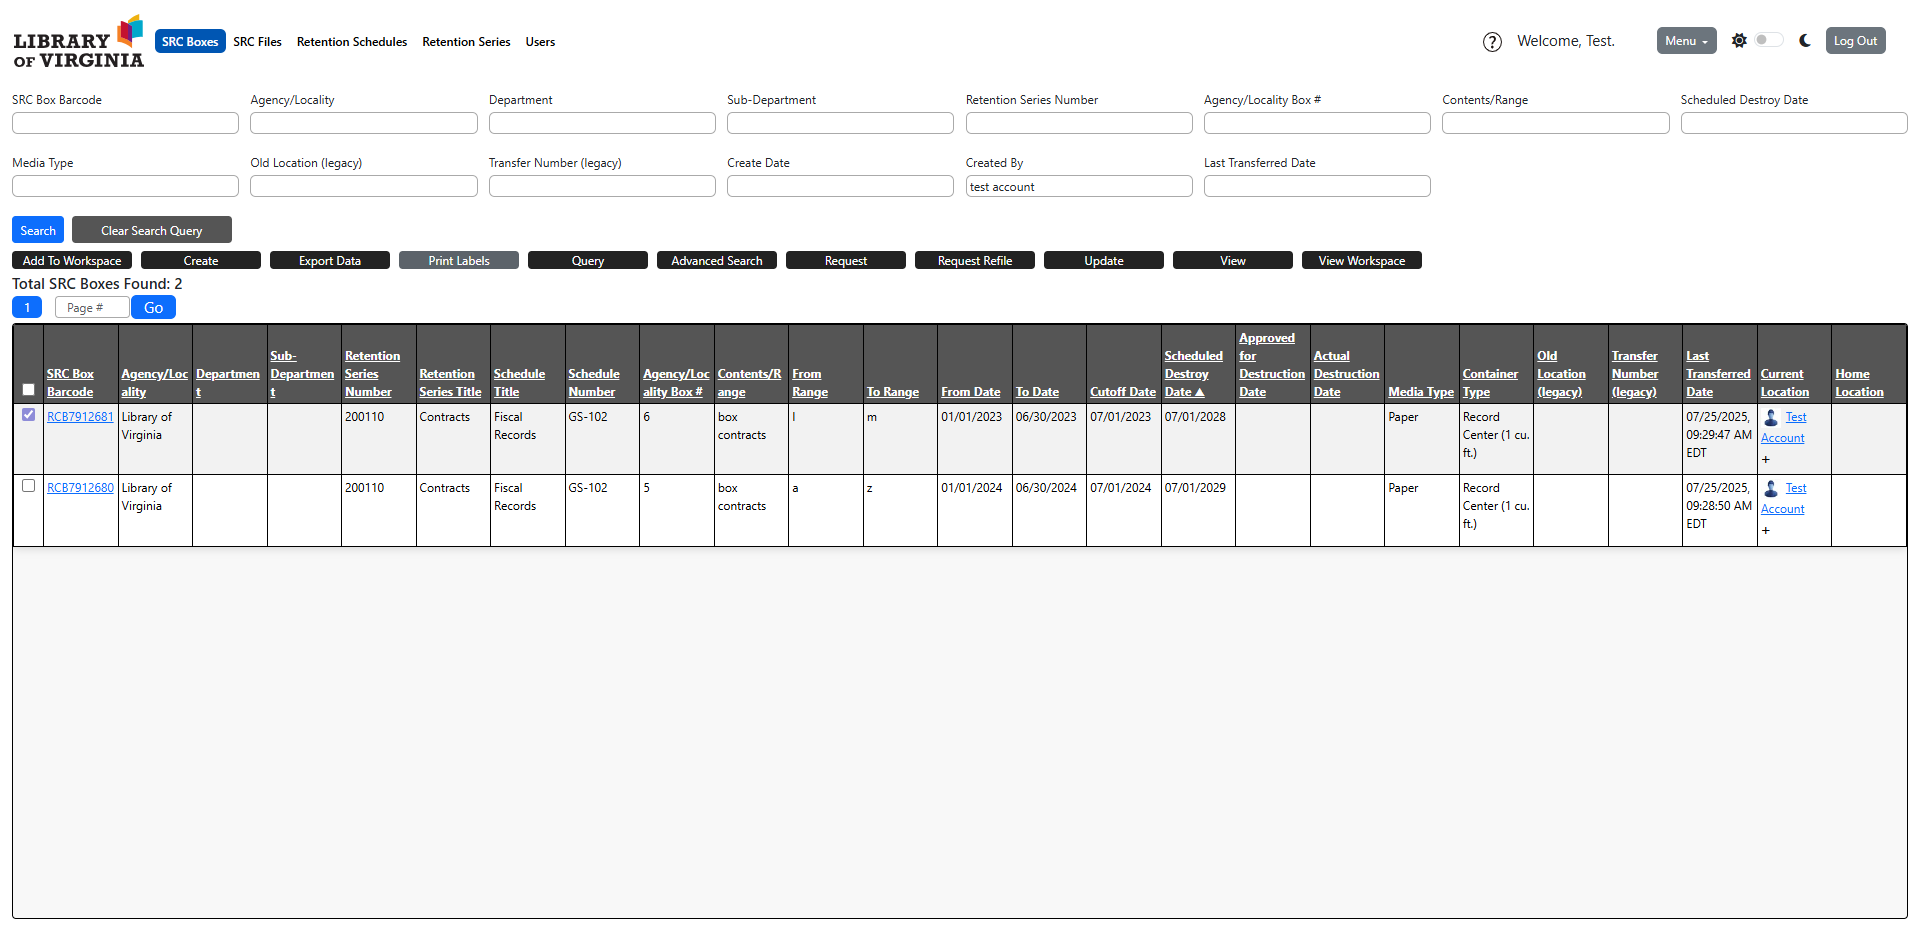
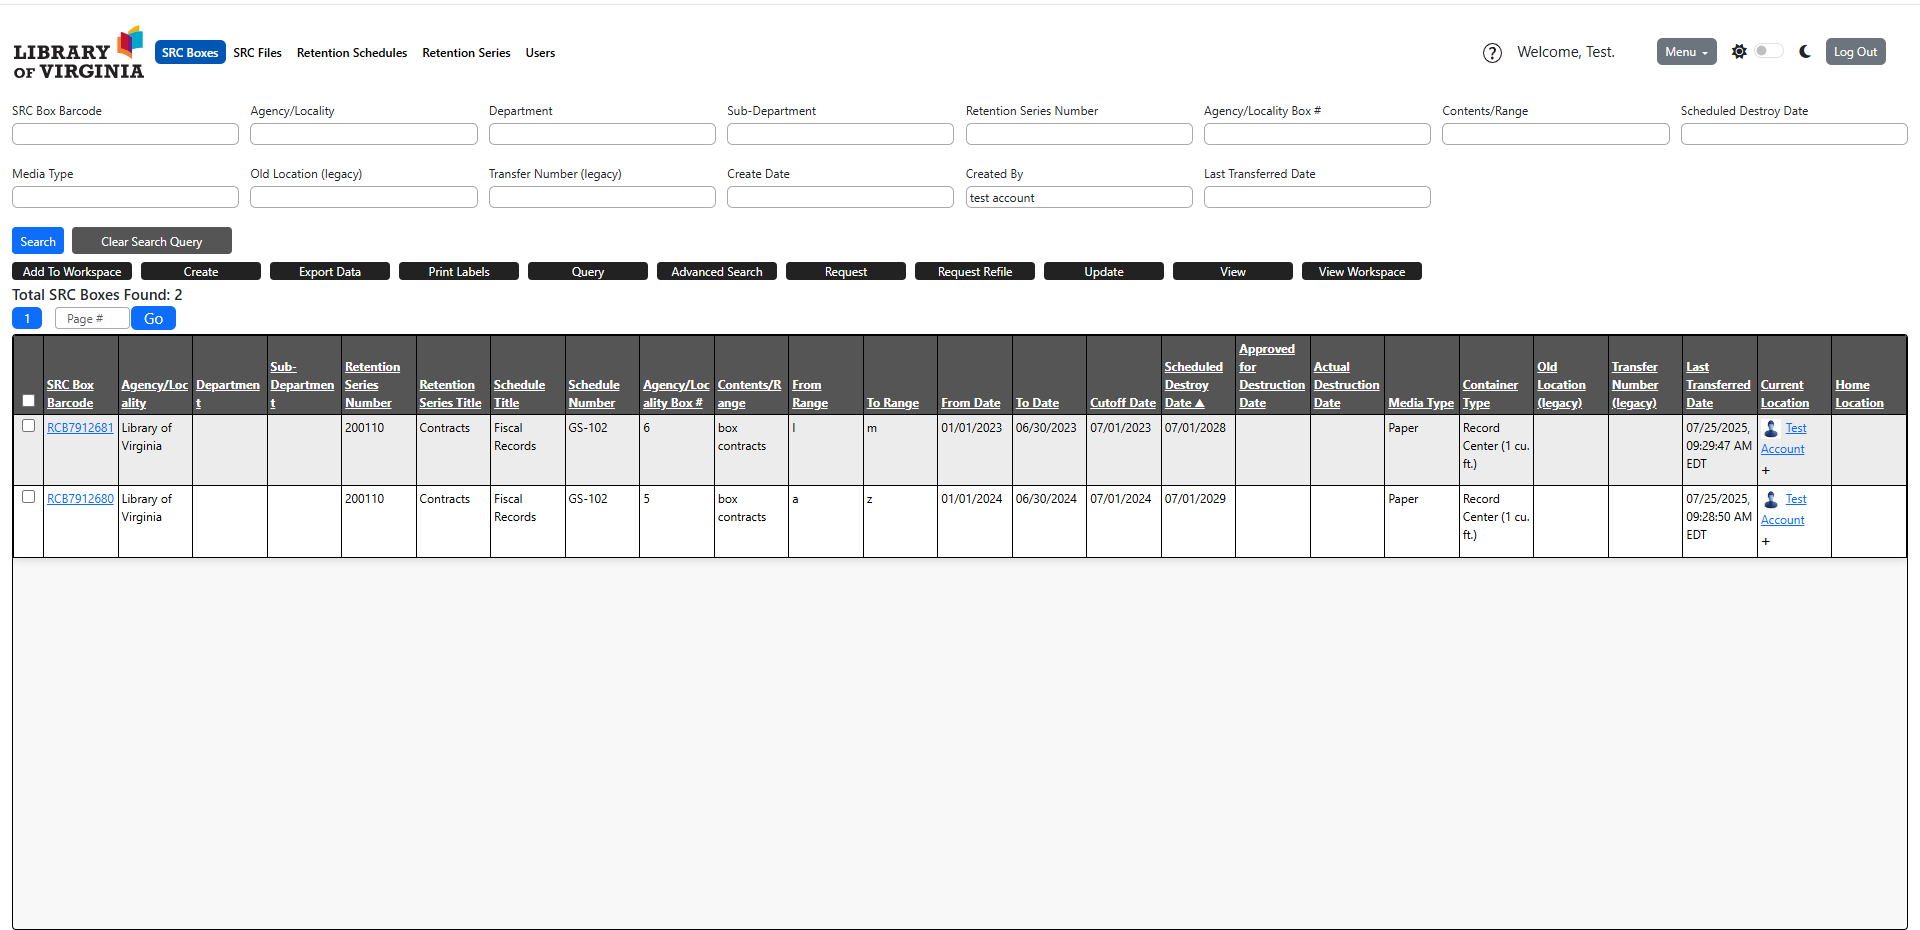
You can view your boxes if you use the search field “Created by” and enter your name.
To sort your boxes, you can select the column you wish to sort. Below is an example of sorting the “Scheduled Destroy Date” column.

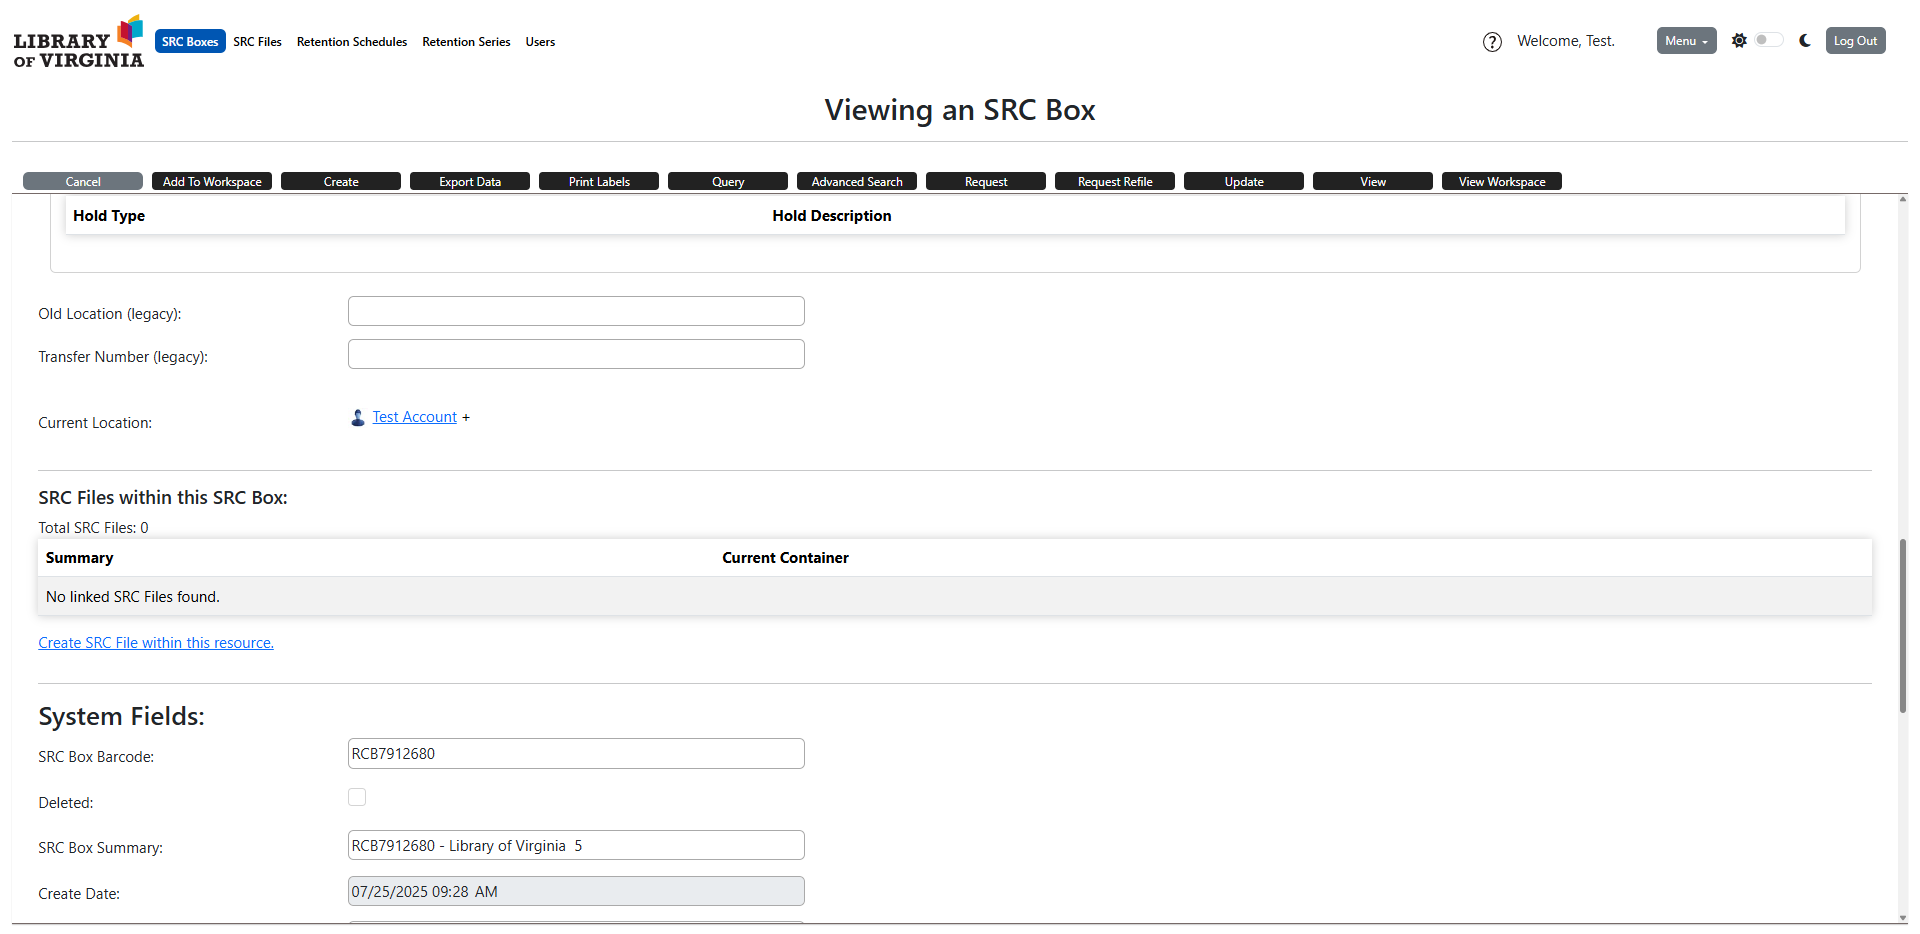
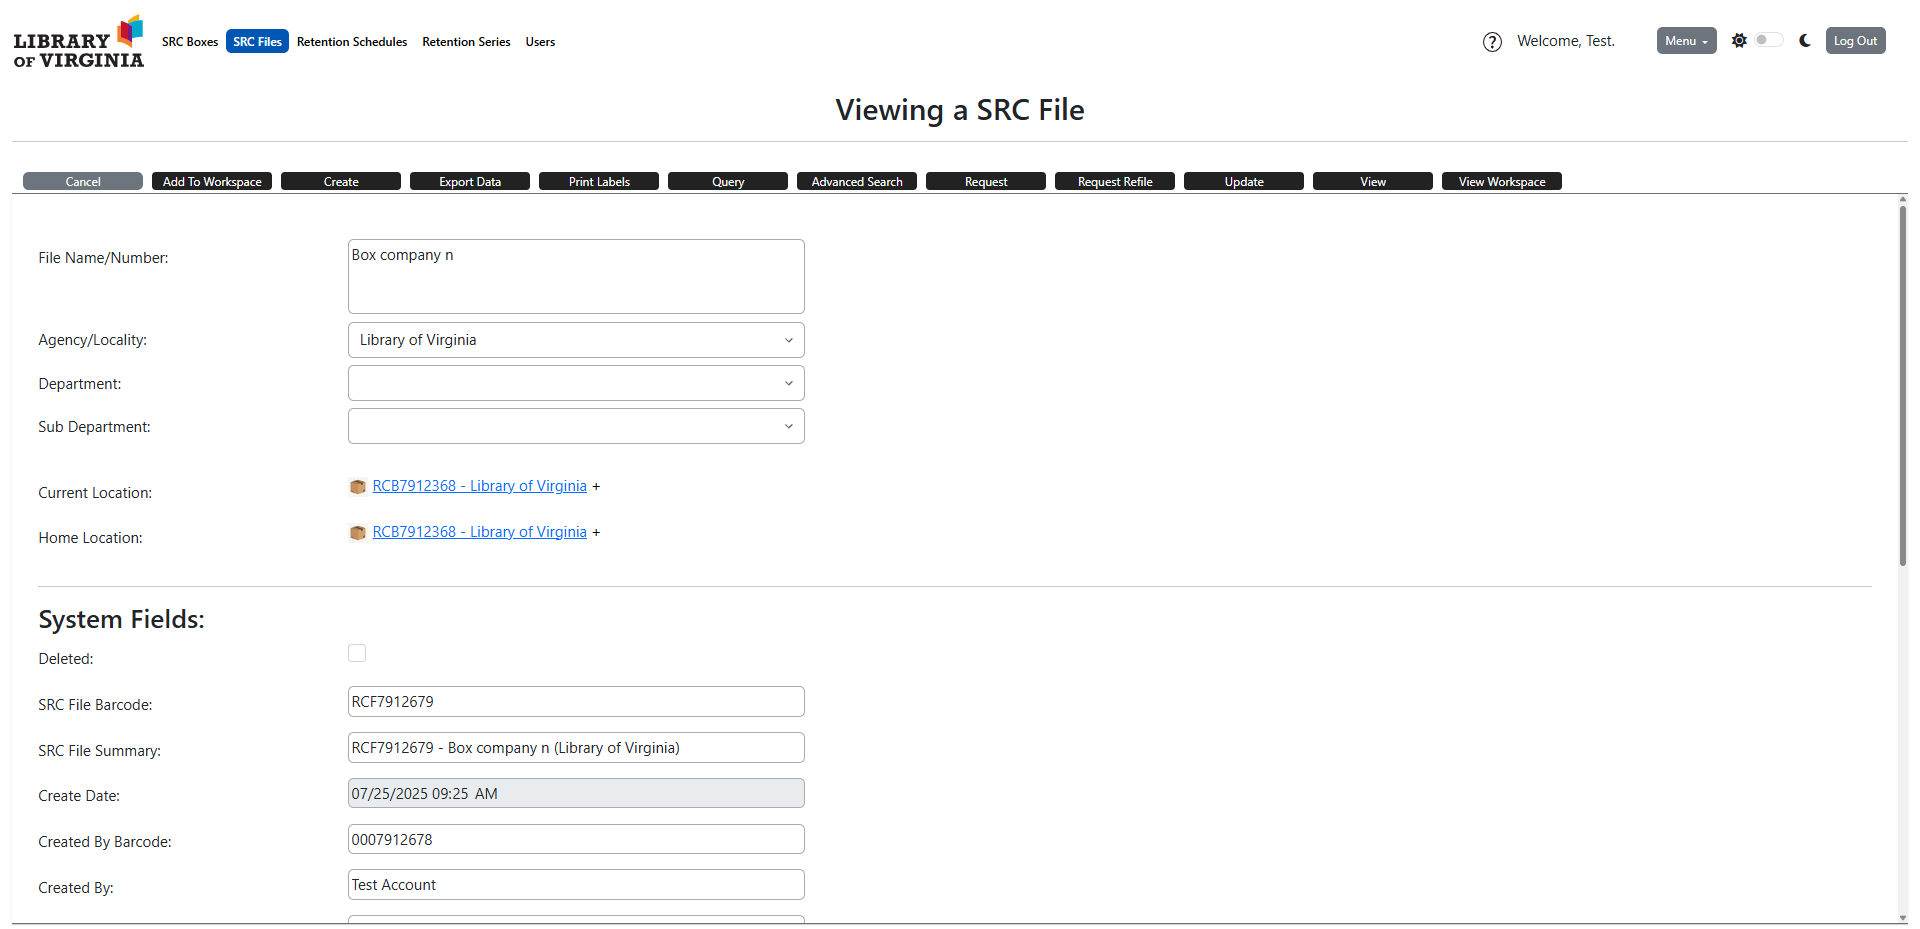
To create a file in ShelfLife, go to the box the file is in and scroll down to the section titled “SRC Files within this SRC Box”. Then, select “Create SRC File within this resource”.
Enter the appropriate file name or number. Avoid changing the department information.
Once done, select one of three options:
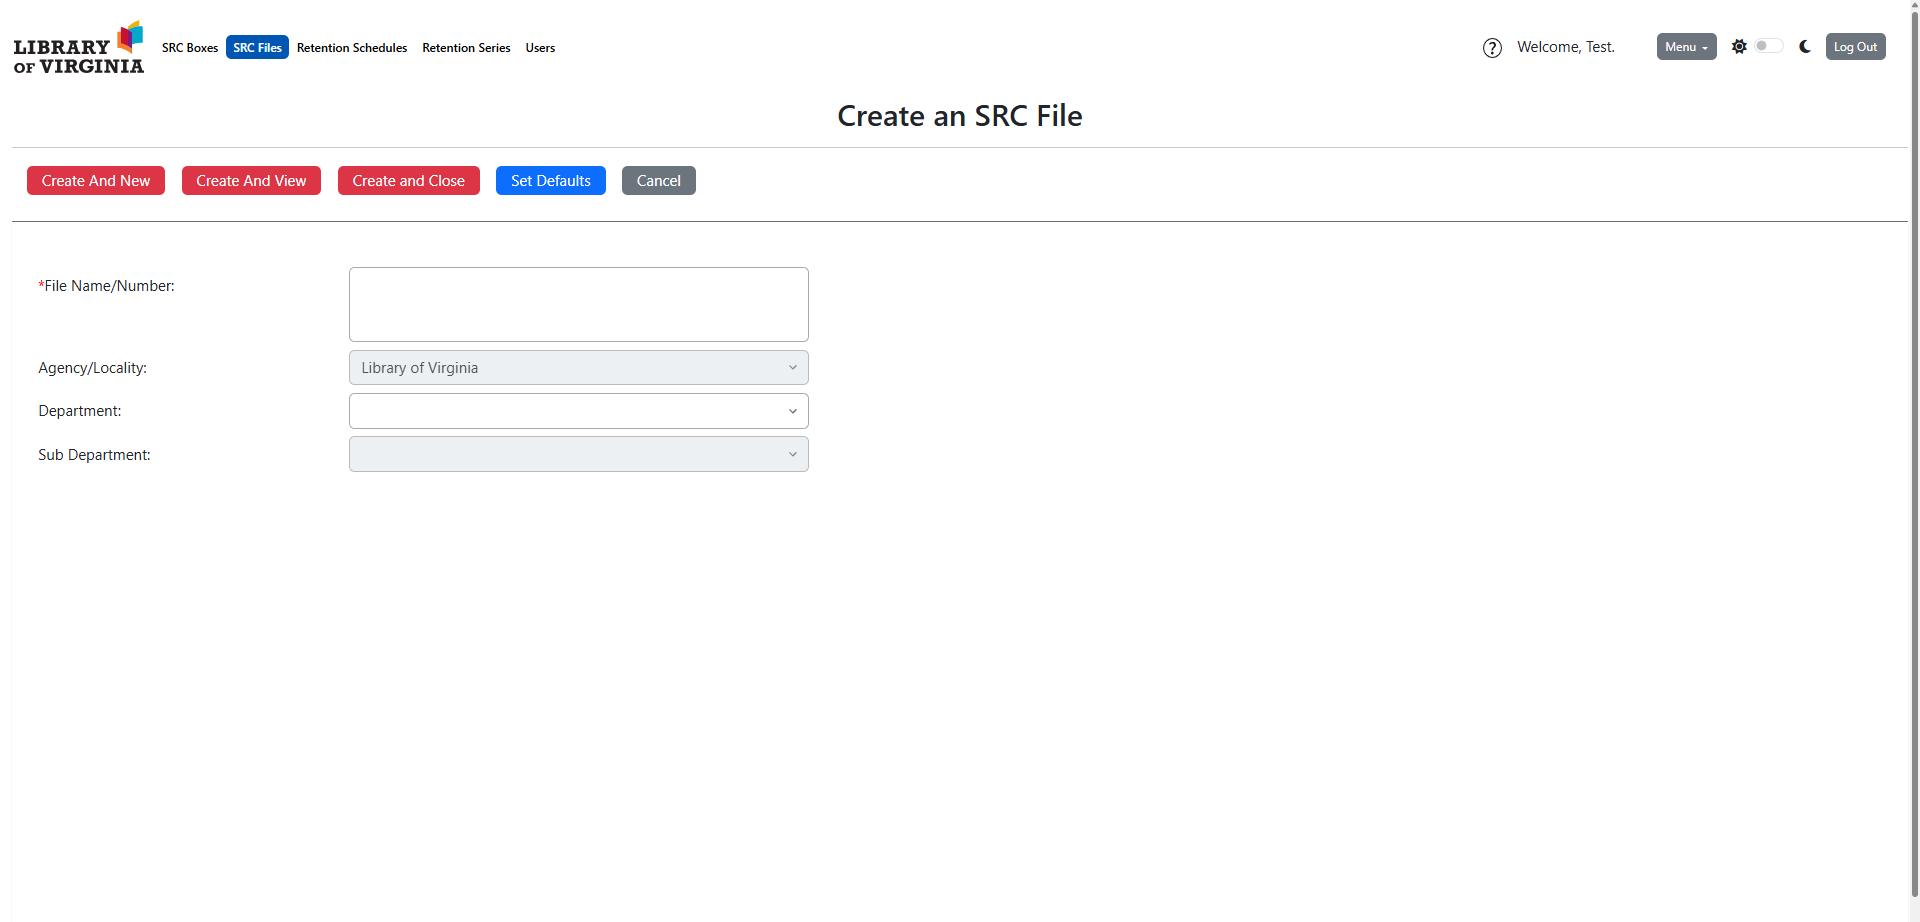
Once you’ve created the file, you will receive a pop-up message letting you know if the creation was a success.

To print your labels, open the “Menu” dropdown and select “Barcode Label Queue”.

All your new labels should appear in the queue.
The “Starting Position” is automatically set to 1. If you have a full sheet of labels to print on, you can keep this setting. If you have a partially-empty sheet, you can adjust the “Starting Position” as necessary.
To print your labels, you can either select them individually and select the “Print Selected Barcode Labels” button or you can print them all using the “Print All Barcode Labels in the Queue” button.

Once you have selected a button, you will receive a pop-up with additional information. Ensure that ShelfLife has permission to send you pop-ups so that it can open a new tab with your print preview.

If you are printing multiple labels and use 1 as your “Starting Position”, your print preview should look similar to the below screenshot.

If you have used a different “Starting Position”, your print preview will move the barcodes accordingly. The below example has a “Starting Position” of 5.

Be sure to remove your labels from the queue after you have printed them. You can do this by selecting individual labels and “Remove Selected Barcode Labels From Queue” button or by selecting the “Remove All Barcode Labels From Queue” button.

To reprint a label that has been deleted from the queue, find the appropriate box in your “SRC Boxes” tab and select the “Print Labels” button.
You can either select “Print Barcode” or “Send to Label Queue” to print from there.

If you need to reprint a file label that was deleted from the queue, find the appropriate file and select the “Print Labels” button.
You can either select “Print Barcode” or “Send to Label Queue” to print from there.

Your file barcode label should look like the below screenshot if you have set your “Starting Position” to 1.

You can search for boxes from the “SRC Boxes” tab, using the fields that appear at the top of the screen. ShelfLife does not require exact or complete terms to search, so there is no need to type out departments with precision.

You can use as many or as few fields as you’d like. Adding a sub-department reduces the number of boxes in this search result.

To export your box data, first make sure you’re on the “SRC Boxes” tab and have your boxes available. Then, select the “Export Data” button.
When you first navigate to the Data Export, all fields will be blank.

Use the “Choose Saved Export” field and select “Destruction approval list”. This will select all fields necessary for the SRC RM-3 form, as shown below.
Ensure that you have selected the radio button for the appropriate number of boxes. If you have selected a specific box, you will choose the first radio button. If you would like the export to include your full search results from the previous page, choose the second option.
Select the “Export Data” button when you have finished.

You will receive a pop-up from the system and a download with the relevant information.

Your spreadsheet will be populated with the export data. Ensure that you save your file using the following template as a filename: Agency Name Department Sub-department RM3 year-month-day.
This spreadsheet should be attached to your SRC RM-3.

For more instructions, select the question mark icon beside the “Welcome” message.
From there, select the blue button that says “SRC customer instructions”.
